 AI
AIPeri-implant Gingiva and Emergence Profile: How Material Changes Everything
Zirconia, titanium, or PMMA for the implant-crown transition zone? The emergence profile material influences peri-implant soft tissue health more than you might think.
TL;DR
The emergence profile material directly influences peri-implant gingival health: zirconia has shown lower bacterial adhesion compared to CAD/CAM-milled titanium, while provisional PMMA remains indispensable for tissue maturation. The choice depends on the area, gingival biometry, and loading time.
The material chosen for the implant emergence profile is not a secondary aesthetic detail: it is one of the factors that most concretely affects the stability of peri-implant soft tissues in the medium to long term. Zirconia, titanium, provisional PMMA—each interacts differently with the mucosa, with bacterial biofilm, and with the local immune response.
Yet, in daily practice, the choice of material is often delegated to immediate availability or production convenience, without structured clinical reasoning behind it.
Why the Emergence Profile is a Critical Area
The emergence profile is the anatomical space extending from the implant neck—or the abutment margin—to the free gingival margin. It is the area where the prosthetic restoration passes through the soft tissue and must be biologically neutral: it must not irritate, must not promote plaque accumulation, and must not generate excessive pressure.
According to a systematic review published in Clinical Oral Implants Research (2021), the surface roughness of the subgingival material is statistically significantly correlated with biofilm accumulation and marginal bleeding index. Materials with a roughness Ra greater than 0.2 µm promote bacterial colonization measurably.
The critical surface roughness for bacterial colonization is Ra = 0.2 µm. Below this threshold, the reduction in bacterial adhesion becomes negligible. Milled ceramic materials easily achieve Ra < 0.1 µm; milled titanium is around 0.1–0.2 µm; provisional PMMA can exceed 0.3 µm if not adequately polished.
The Three Materials Compared
Zirconia: The Aesthetic-Biological Candidate
Zirconia is currently the reference material for abutments in the anterior region. Its main biological characteristic is low surface energy, which translates into poor bacterial adhesion. A comparative study published in the Journal of Periodontology (2022) found that, after 12 months, sites with zirconia abutments had an average probing depth 0.4 mm lower than sites with titanium abutments, with a statistically significant difference (p < 0.05).
Zirconia, however, is not without its limitations:
- It cannot be easily ground or reduced in the mouth after cementation—any adjustments must be made beforehand, in the CAD workflow.
- The connection between zirconia and the implant (zirconia-titanium interface) must be designed with tight tolerances to avoid micromovements that generate mechanical inflammation.
- In posterior areas under high occlusal load, monolithic zirconia is preferable to layered zirconia to reduce the risk of fracture at the neck.
Titanium: The Mechanically Safe Choice
CNC-milled titanium has superior mechanical performance in terms of fracture and deformation resistance. It is the historical choice for implant abutments and remains irreplaceable in cases with difficult angulations, high occlusal loads, or external hex connections requiring maximum rotational stability.
Its surface, by naturally oxidizing, forms a passivating layer of biocompatible TiO₂. However, machine-milled titanium has more variable surface roughness than zirconia; especially with less precise 3-axis milling, it can exceed the critical threshold of 0.2 µm.
An often underestimated aspect: in anterior areas with thin gingiva (biotype 1), the gray color of titanium can show through the soft tissue, compromising the aesthetic result even with a perfectly layered zirconia crown on top.
PMMA: The Forgotten Material That Should Not Be Forgotten
PMMA for gingival conditioning temporaries is the silent protagonist of long-term success. Its function is neither aesthetic nor definitive mechanical: it is biological and formative.
A well-profiled PMMA temporary, delivered immediately after implant placement (or after uncovering), allows:
- to shape the soft tissue into the desired form before finalizing the definitive restoration;
- to test the volume of the emergence profile on the patient's aesthetics;
- to establish the gingival margin in a stable position before taking the impression or performing the definitive scan.
According to a study published in The International Journal of Prosthodontics (2023), gingival conditioning with PMMA temporaries for at least 6-8 weeks before the definitive prosthesis significantly reduces mucosal margin variation post-delivery, increasing the aesthetic stability of the final result.
Technical Comparison: Zirconia vs. Titanium vs. PMMA
| Parameter | Zirconia | CNC Titanium | Milled PMMA |
|---|---|---|---|
| Surface Roughness Ra | < 0.1 µm | 0.1–0.2 µm | 0.2–0.4 µm |
| Bacterial Adhesion | Low | Medium | Medium-High |
| Fracture Resistance | Medium-High | High | Low |
| Aesthetic Compatibility | Excellent | Poor (ant. area) | Good (temporary) |
| Definitive Use | Yes | Yes | No |
| CAD/CAM Workability | High | High | High |
| Material Cost | High | Medium | Low |
| Main Indication | Anterior, aesthetics | Posterior, high loads | Gingival conditioning |
The Emergence Profile in Different Gingival Biotypes
Not all tissues respond in the same way. The classification into gingival biotypes (Kao and Pasquinelli, 2002, revised by Cairo, 2017) distinguishes between:
- Thin biotypes (type 1): Fragile gingiva, high transparency, responds poorly to compression. Requires a conservative emergence profile, with not overly pronounced angulations in the subgingival area.
- Thick biotypes (type 2): Greater volume and resistance, tolerates moderate pressure during conditioning, responds better to pressurized temporaries.
- Intermediate biotype (type 3): The most common clinical situation, requires case-by-case evaluation.
How the Profile is Designed in the CAD Workflow
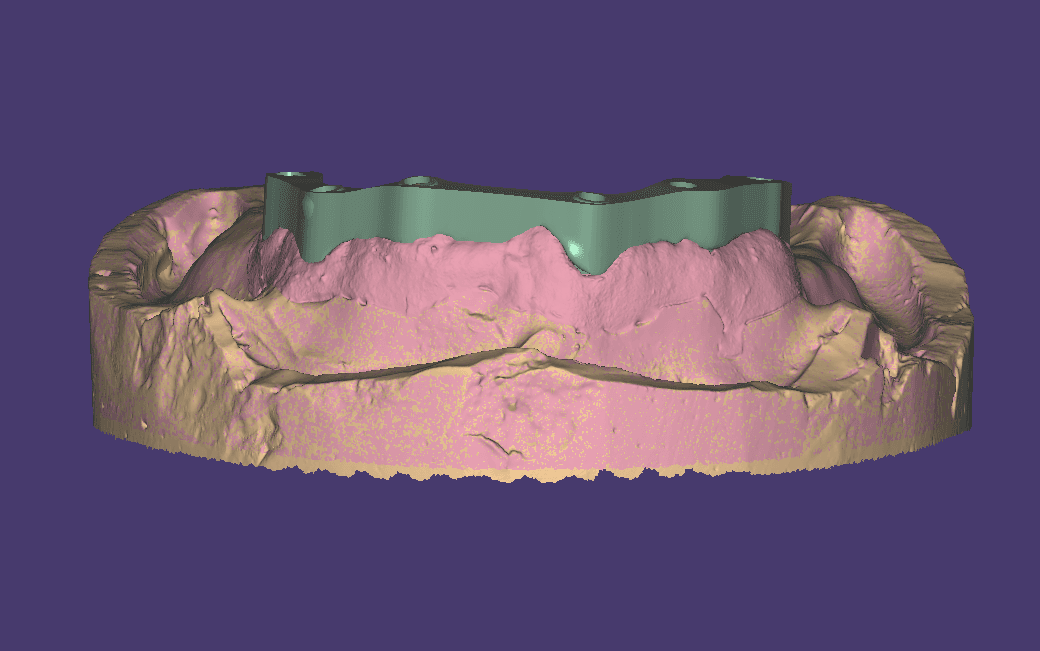
Designing the emergence profile in the design software requires an approach that goes beyond the simple shape of the restoration. The parameters that the designer must actively control are:
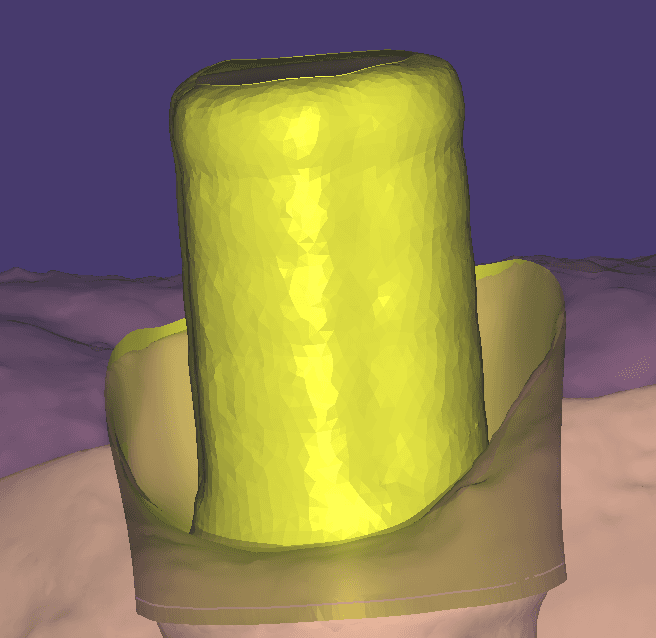
1. Subgingival Emergence Angle The angle between the implant neck axis and the external surface of the restoration in the subgingival area. A high angle (excessive convexity) compresses the tissue and can cause local ischemia and recession. The goal is to maintain as vertical a transition as possible in the first millimeter subgingivally, with progressive convexity towards the free margin.
2. Exit Diameter at the Platform The diameter of the restoration at the implant platform level — which generally coincides with the connection diameter — must match that of the implant. Discrepancies of even 0.3–0.5 mm create micro-gaps that act as bacterial niches.
3. Point of Maximum Convexity The transition from the vertical subgingival area to the convex supragingival area must be located at the level of the free mucosal margin — not below (risk of compression) nor too far above (loss of aesthetic support).
Before finalizing the CAD file for an abutment or screw-retained prosthesis, ask the clinician for an occlusal photograph with a millimeter probe resting on the gingival margin: this gives you the vertical tissue thickness at three points (mesial, distal, buccal) and allows you to calibrate the emergence angle without having to guess.
4. Abutment-Crown Transition Surface (in the case of cemented restorations) If the restoration is cemented, the micro-geography of the abutment surface in the cervical area influences the amount of excess cement that remains trapped. A smooth, well-profiled surface facilitates the removal of excess cement, reducing the risk of mucositis and peri-implantitis from residual cement.
A Case That Made Us Reflect
Some time ago, within the Dentra network, we received a case of a redo on an anterior element: an implant in area 21, a zirconia crown already delivered, and the patient dissatisfied due to evident buccal recession three months after delivery. Analysis of the original CAD file showed an emergence profile designed with excessive convexity already 1 mm below the margin, with an exit angle of approximately 45° — almost double that recommended for a thin biotype.
The redo included a new PMMA temporary with an almost vertical profile in the subgingival area, maintained for 8 weeks. The tissue partially recovered, and the definitive crown — this time with a corrected emergence angle — was delivered with a stable result at 6-month follow-up.
This is not an exceptional case: it is the most frequent type of error we observe when the profile design is left to default software parameters, without a specific clinical evaluation of the biotype and residual ridge.
Cement-Induced Peri-implantitis: The Hidden Risk
An aspect that deserves a separate paragraph is the correlation between a poorly designed emergence profile and cement-induced peri-implantitis. According to a study by Wilson (2009, Journal of Periodontology), extruded subgingival cement was identified as a causative factor in over 80% of peri-implantitis cases in surgically examined cemented prostheses.
The solution is not necessarily to switch to screw-retained prostheses (although this completely eliminates the cement problem), but to design the profile so that the cementation line is accessible, controllable, and possibly supragingival or at most juxtagingival.
This is achieved by:
- abutment margin positioned no more than 1.5 mm subgingivally in the buccal area;
- emergence profile that does not create undercuts in the cementation access area;
- selection of low-viscosity cements with predictable excess removal time.
Residual subgingival cement is invisible on standard radiographs in over 50% of cases (source: Clinical Implant Dentistry and Related Research, 2012). If there is bleeding on probing around a cemented implant, surgically explore before diagnosing "idiopathic" bacterial peri-implantitis.
Checklist: Designing a Correct Emergence Profile
Before finalizing the CAD file for any implant prosthesis, check these points:
- ☐ Gingival biotype identified — did the clinician indicate thin, thick, or intermediate?
- ☐ Subgingival margin depth — no more than 1.5 mm in the vestibular area
- ☐ Subgingival emergence angle — ≤ 20–25° relative to the implant axis in thin biotypes
- ☐ Diameter at the platform — exactly matches the diameter of the implant connection
- ☐ Point of maximum convexity — at the level of the mucosal margin, not below
- ☐ Material consistent with the area — zirconia in the anterior, titanium or zirconia in the posterior
- ☐ Provisional PMMA planned — is gingival conditioning scheduled?
- ☐ Access for cementation — is the margin reachable for excess cement removal?
Frequently Asked Questions
Can I use zirconia for all emergence profiles, even posterior ones?
Yes, but with caution. In posterior areas with high masticatory load, monolithic zirconia is indicated only if the thickness of the restoration ensures sufficient cross-section. If the implant geometry and preparation do not allow for this, titanium remains the mechanically safer choice. The evaluation should be done on a case-by-case basis in the CAD file.
How long is the PMMA provisional needed before the definitive prosthesis?
The most cited literature data indicate 6–8 weeks as a minimum for soft tissue maturation (source: The International Journal of Prosthodontics, 2023). In cases with abundant tissue and a thick biotype, it can be reduced to 4 weeks; in aesthetically critical areas with a thin biotype, some clinical schools recommend up to 12 weeks.
Can the roughness of milled PMMA be improved?
Yes: manual polishing of the milled provisional significantly reduces surface roughness, bringing Ra values from 0.3–0.4 µm down to 0.15–0.20 µm. This is one reason why manual finishing of provisionals remains a step that cannot be skipped, even with quality CNC milling.
How do you communicate the profile to the lab if the clinician only does a scan?
With intraoral scanning, it is possible to capture the profile of the approved provisional and transmit it as a reference file for definitive design. This technique — scanning the provisional in situ — is currently the most precise method for digitally transferring the desired gingival form without additional impressions.
At Dentra, the emergence profile is designed on a case-by-case basis according to the clinical indications provided with the order. If the scan file includes the provisional or a note on the gingival biotype, the designer can build an emergence geometry consistent with the patient's clinical reality — reducing the risk of costly remakes and ensuring aesthetic stability over time. You can upload the case directly to dentra.it and receive the design within 24 working hours.
Owner and Technical Director — Dentra
Second-generation dental technician, specialised in dental CAD/CAM, 5-axis milling and Toronto Bridge design. Leading the digital transformation of Dentra since 2017.